

WorkOS organization
Each PromptLayer organization maps to one WorkOS organization. When Enterprise Identity is enabled, PromptLayer creates or links this automatically in most environments.Self-hosted / multi-tenant WorkOS environments: If multiple WorkOS organizations exist and none is linked yet, Owners see a Link WorkOS organization section at the top of Enterprise Identity settings. Select the correct WorkOS org before configuring SSO—linking the wrong one will break sign-in for your IdP.
Connection section
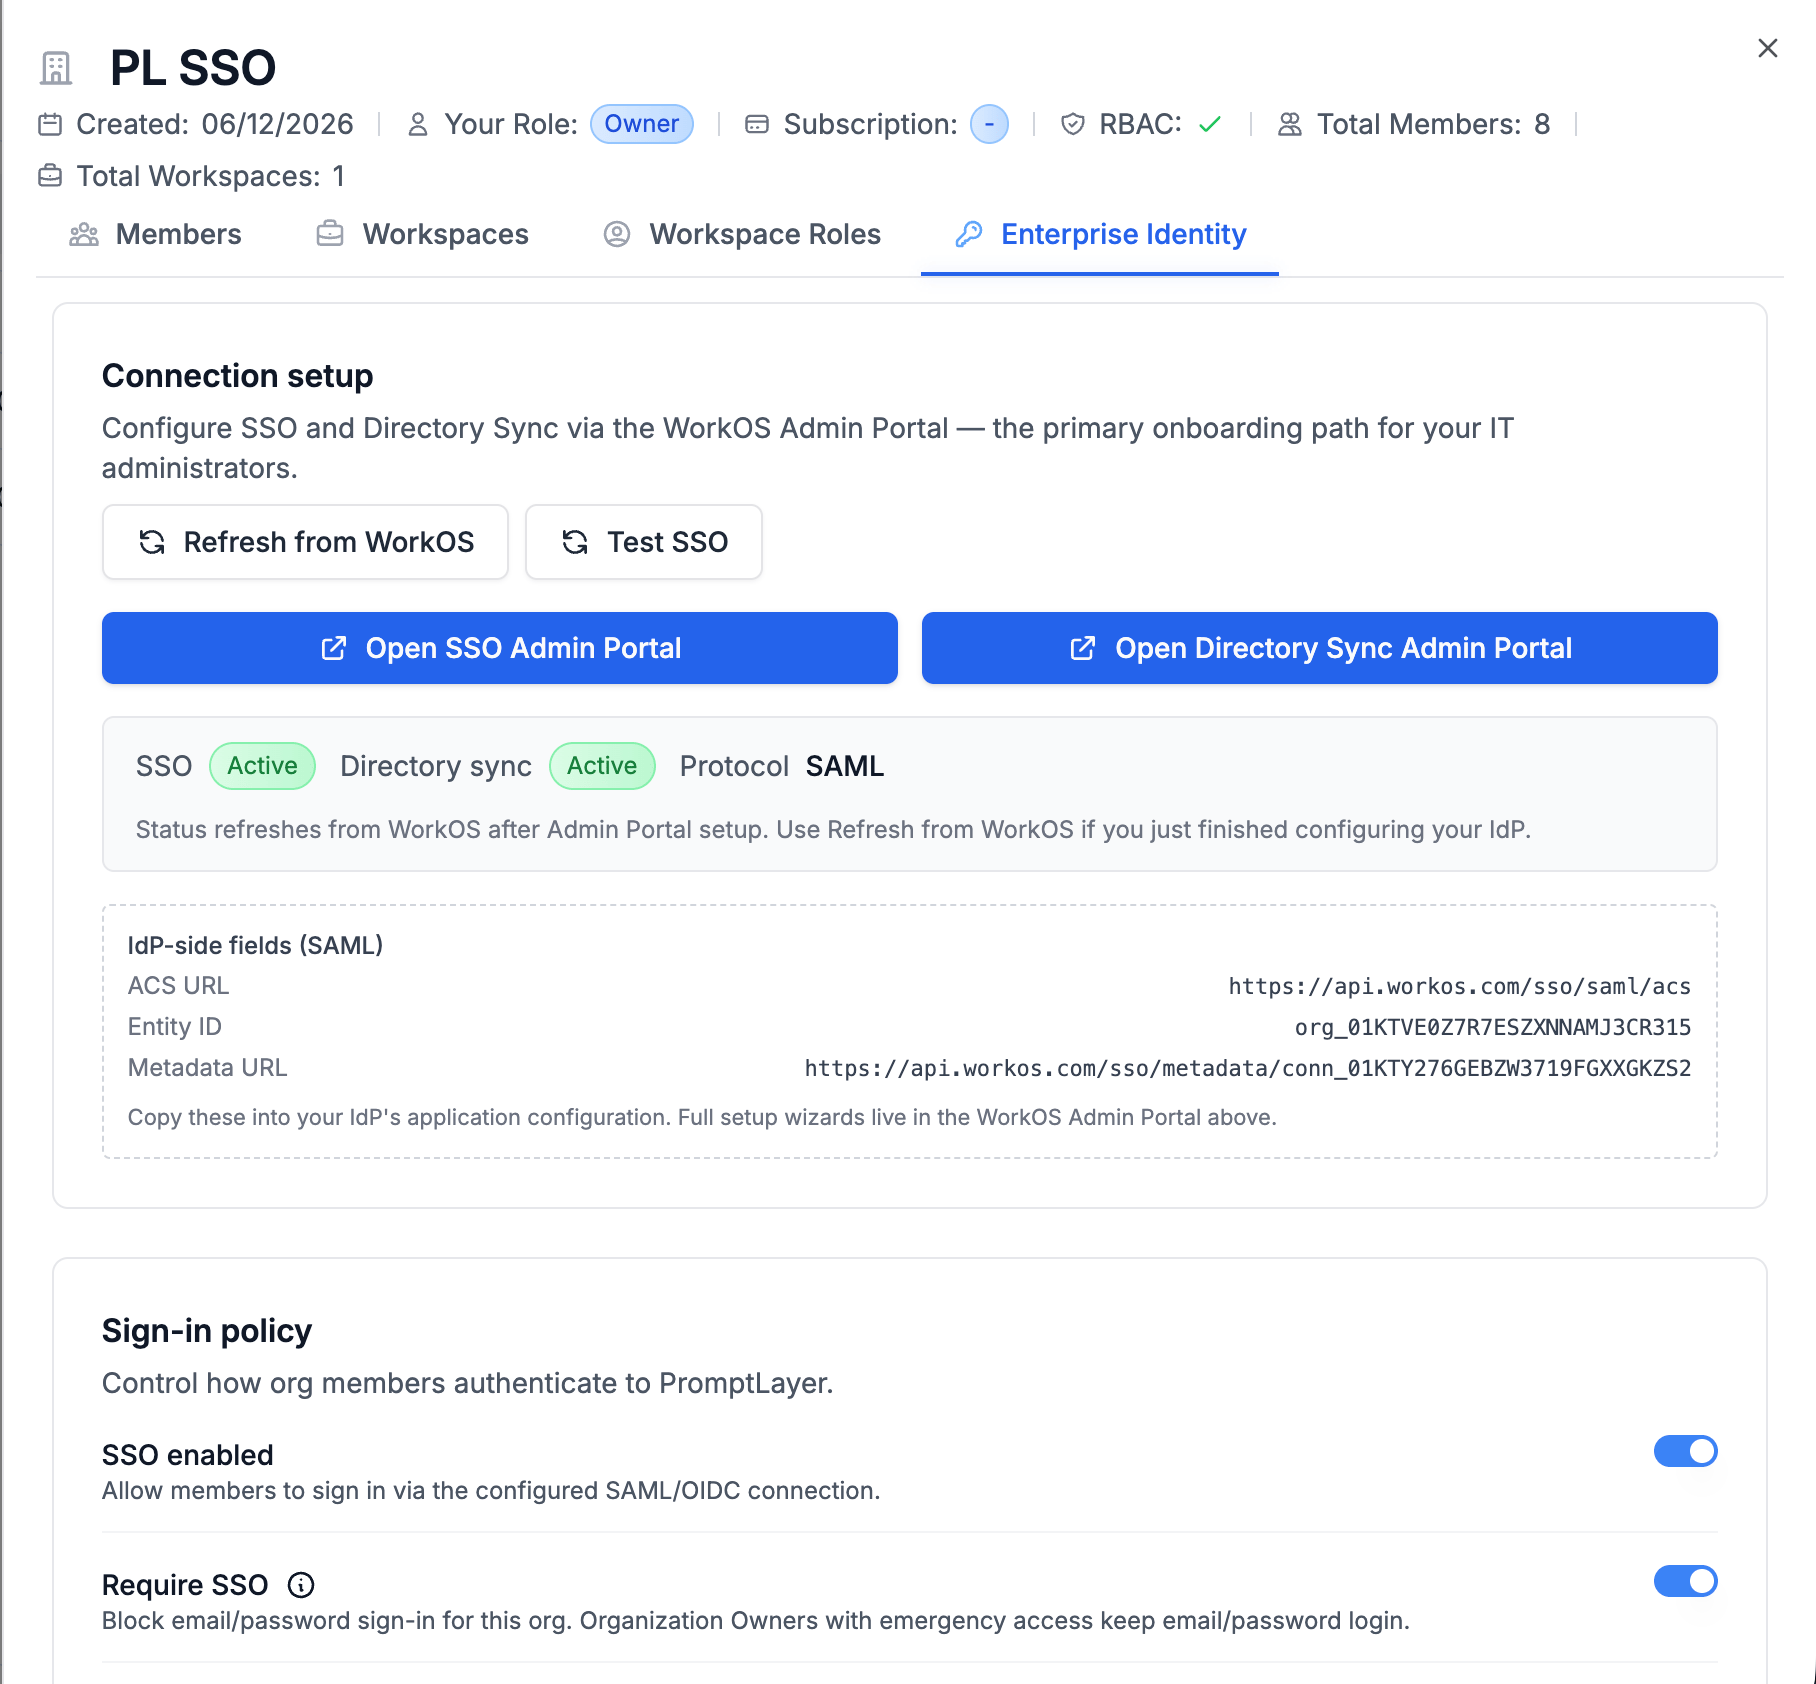
The Connection section shows:- SSO connection status — whether a SAML or OIDC connection is configured and active
- Directory Sync status — whether SCIM provisioning is connected
- Protocol —
samloroidc, detected after SSO setup - Service provider details — copy-ready SAML or OIDC values to paste into your IdP (see below)
- Read-only WorkOS identifiers (organization ID, connection ID, directory ID)
Open the WorkOS Admin Portal
Use the buttons in the Connection section:
The Admin Portal is the supported place to upload IdP metadata, configure allowed email domains, and enable SCIM. PromptLayer embeds WorkOS Admin Portal links—you do not configure raw SAML endpoints inside PromptLayer itself.
Service provider details (SAML / OIDC)
Your IdP application needs service provider (SP) values—ACS URL, SP Entity ID, redirect URI, and so on. WorkOS generates these per SSO connection. PromptLayer displays a Service provider details block in the Connection section once an SSO connection is linked. Open Organization Settings → Enterprise Identity, then click Refresh from WorkOS (or reload the page) to populate it. Each field has a copy button. SAML (paste into your IdP, e.g. Entra ID / Okta)
For SAML, PromptLayer derives these values from the live SSO connection. They match what PromptLayer operators see under Service Provider Details in the WorkOS dashboard.
OIDC
PromptLayer SSO runs through WorkOS. Your IdP integrates with WorkOS using standard SAML or OIDC—there is no separate native OIDC integration outside WorkOS.
Configure SSO with common IdPs
WorkOS supports Okta, Microsoft Entra ID, Google Workspace, OneLogin, and other enterprise IdPs. Follow the in-portal checklist for your provider:- Click Open SSO Admin Portal in PromptLayer.
- In WorkOS Admin Portal, choose your IdP and complete the setup wizard.
- Copy Service provider details from PromptLayer into your IdP (ACS URL, SP Entity ID, or OIDC redirect URI as applicable). During first-time setup, WorkOS may also show SP values in the wizard; after the connection is active, use PromptLayer’s Connection section.
- Upload IdP metadata or enter client credentials in WorkOS.
- Return to PromptLayer and click Refresh from WorkOS so connection status and Service provider details update.
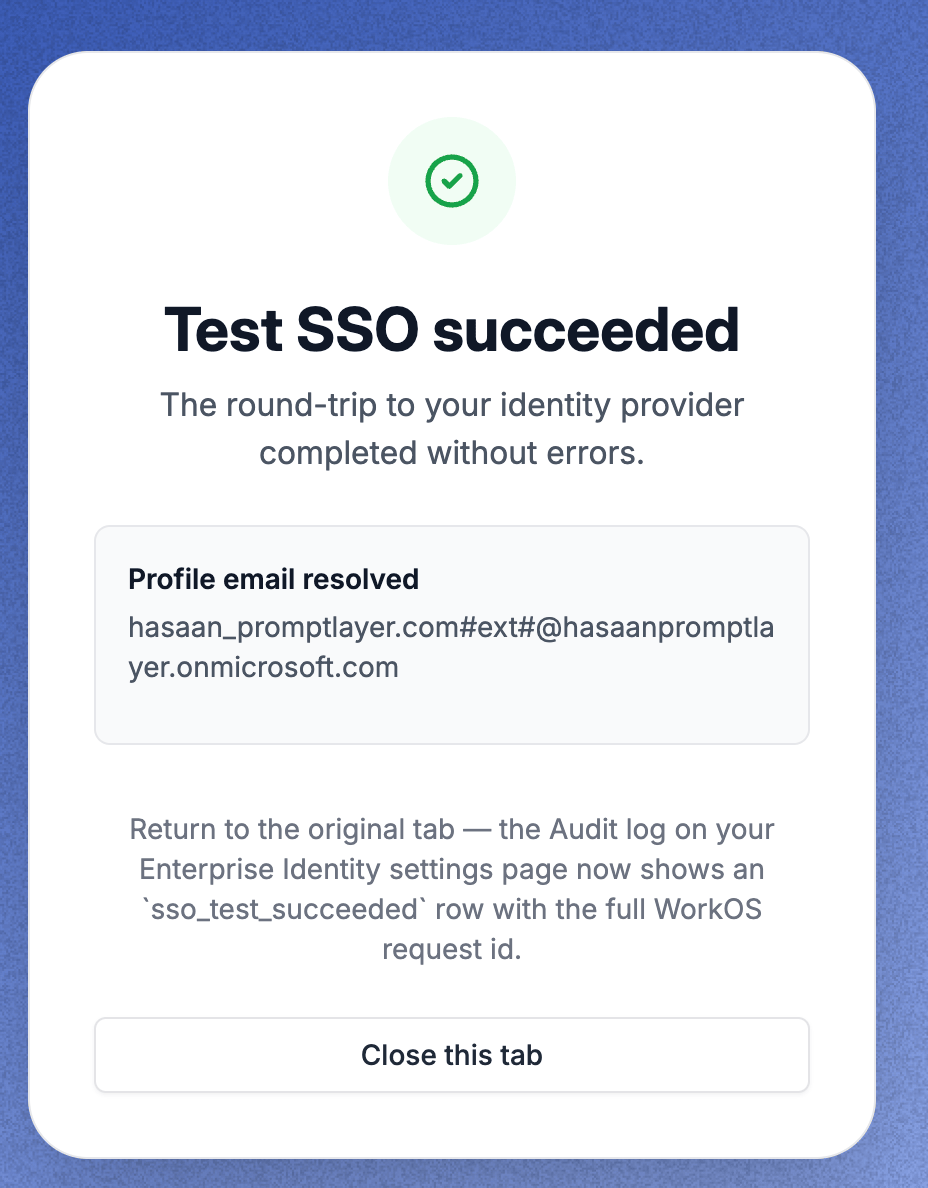
- Click Test SSO and sign in with a test user.
Configure Directory Sync (SCIM)
Directory Sync provisions users and groups from your IdP into WorkOS, which forwards events to PromptLayer:- Click Open Directory Sync Admin Portal in PromptLayer.
- In WorkOS Admin Portal, enable Directory Sync for your IdP (Okta SCIM, Entra provisioning, etc.).
- Assign users and groups in your IdP to the PromptLayer application.
- Return to PromptLayer and click Refresh from WorkOS.
Sign-in policy toggles
The Sign-in policy section (documented in Sign-in policy & break-glass) controls:- SSO enabled — Allow SSO sign-in for org members
- Require SSO — Block email/password for regular members
- JIT provisioning — Auto-create PromptLayer accounts on first successful SSO login
- Complete SSO setup and Test SSO.
- Enable SSO enabled.
- Configure group mappings and default workspace.
- Designate emergency access Owner and complete MFA setup.
- Enable Require SSO when ready to enforce.
Troubleshooting setup
Review the audit log for
sso_test_failed, sso_login_failed, and directory sync events when triaging.