Prerequisites
Before you start, make sure you have a PromptLayer account.Install the PromptLayer skill and MCP servers.
Create a prompt
From the PromptLayer dashboard, click New -> Prompt.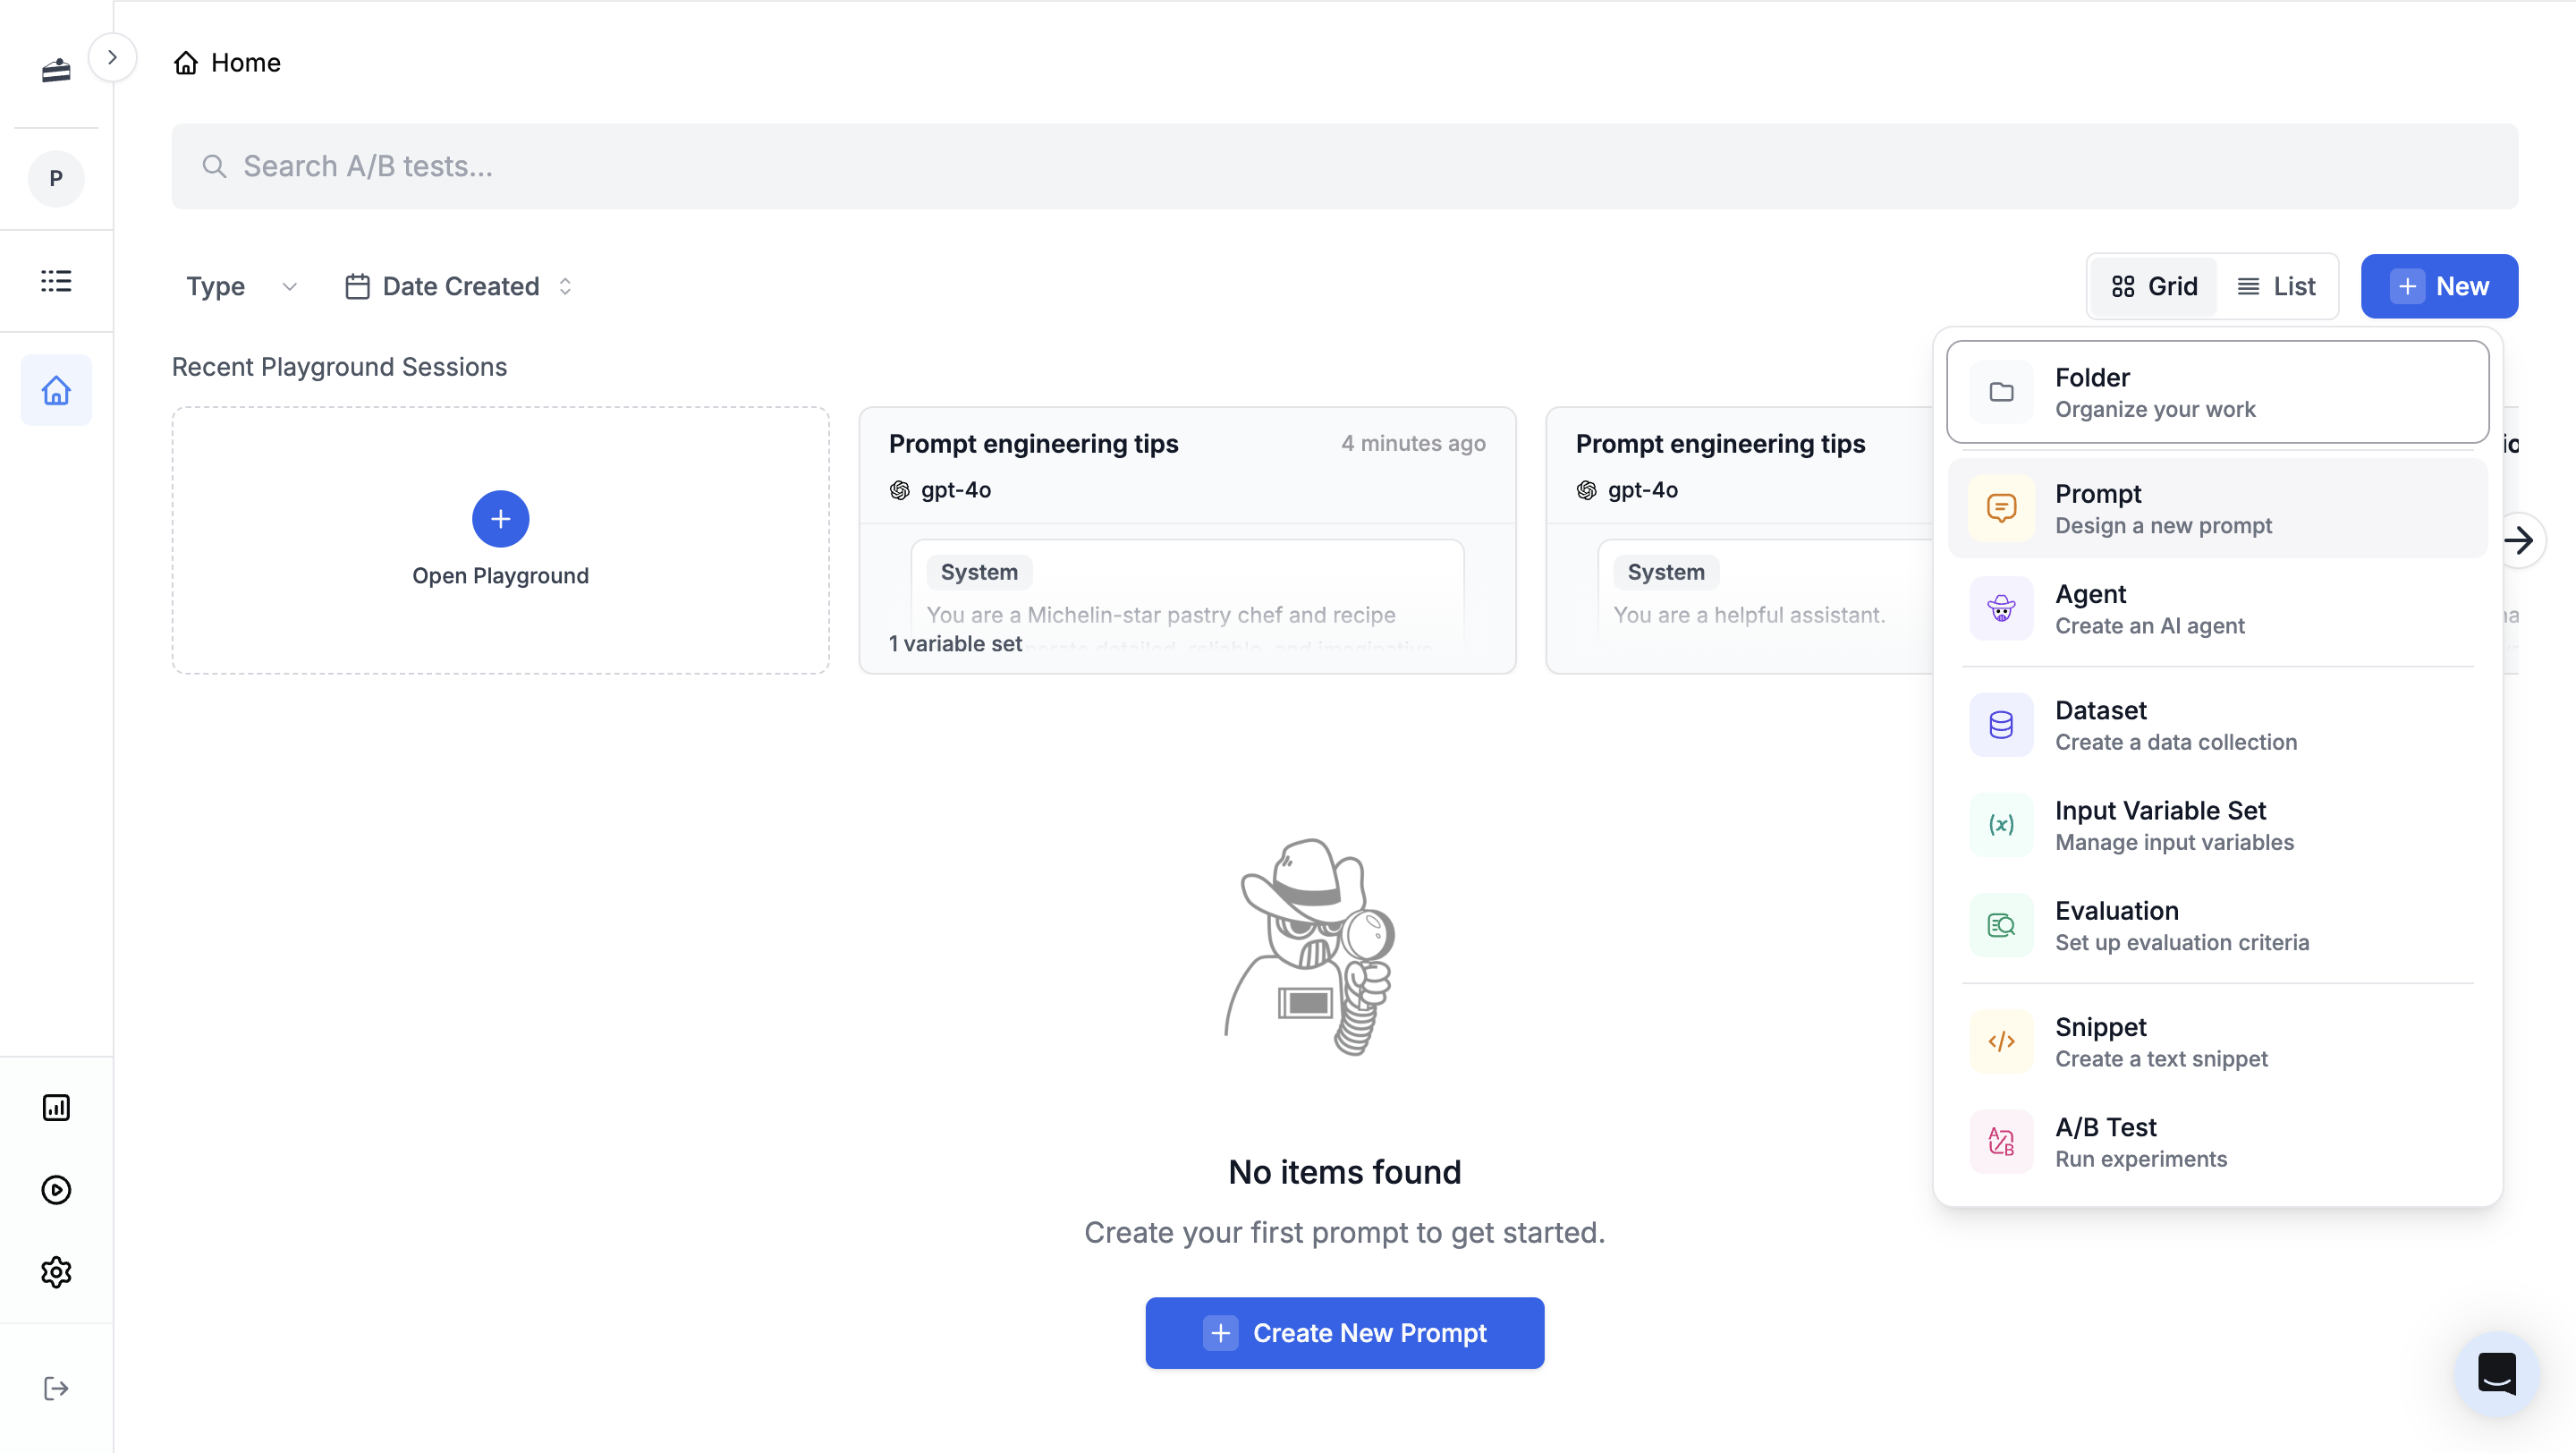
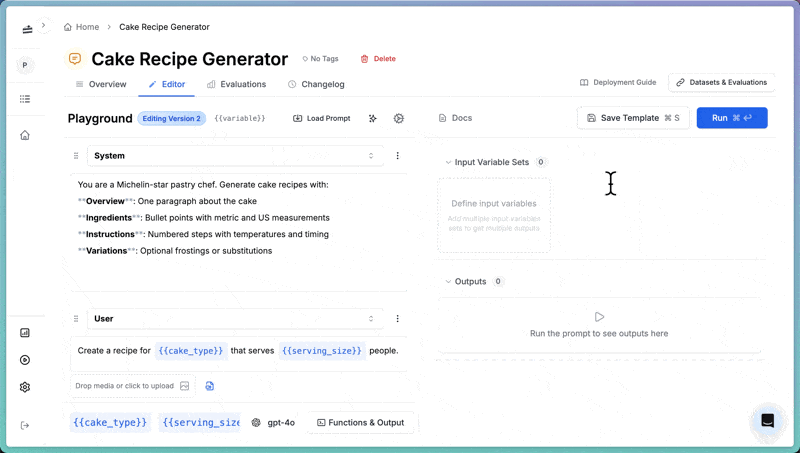
cake-recipe, then replace the default messages with the following content.
System
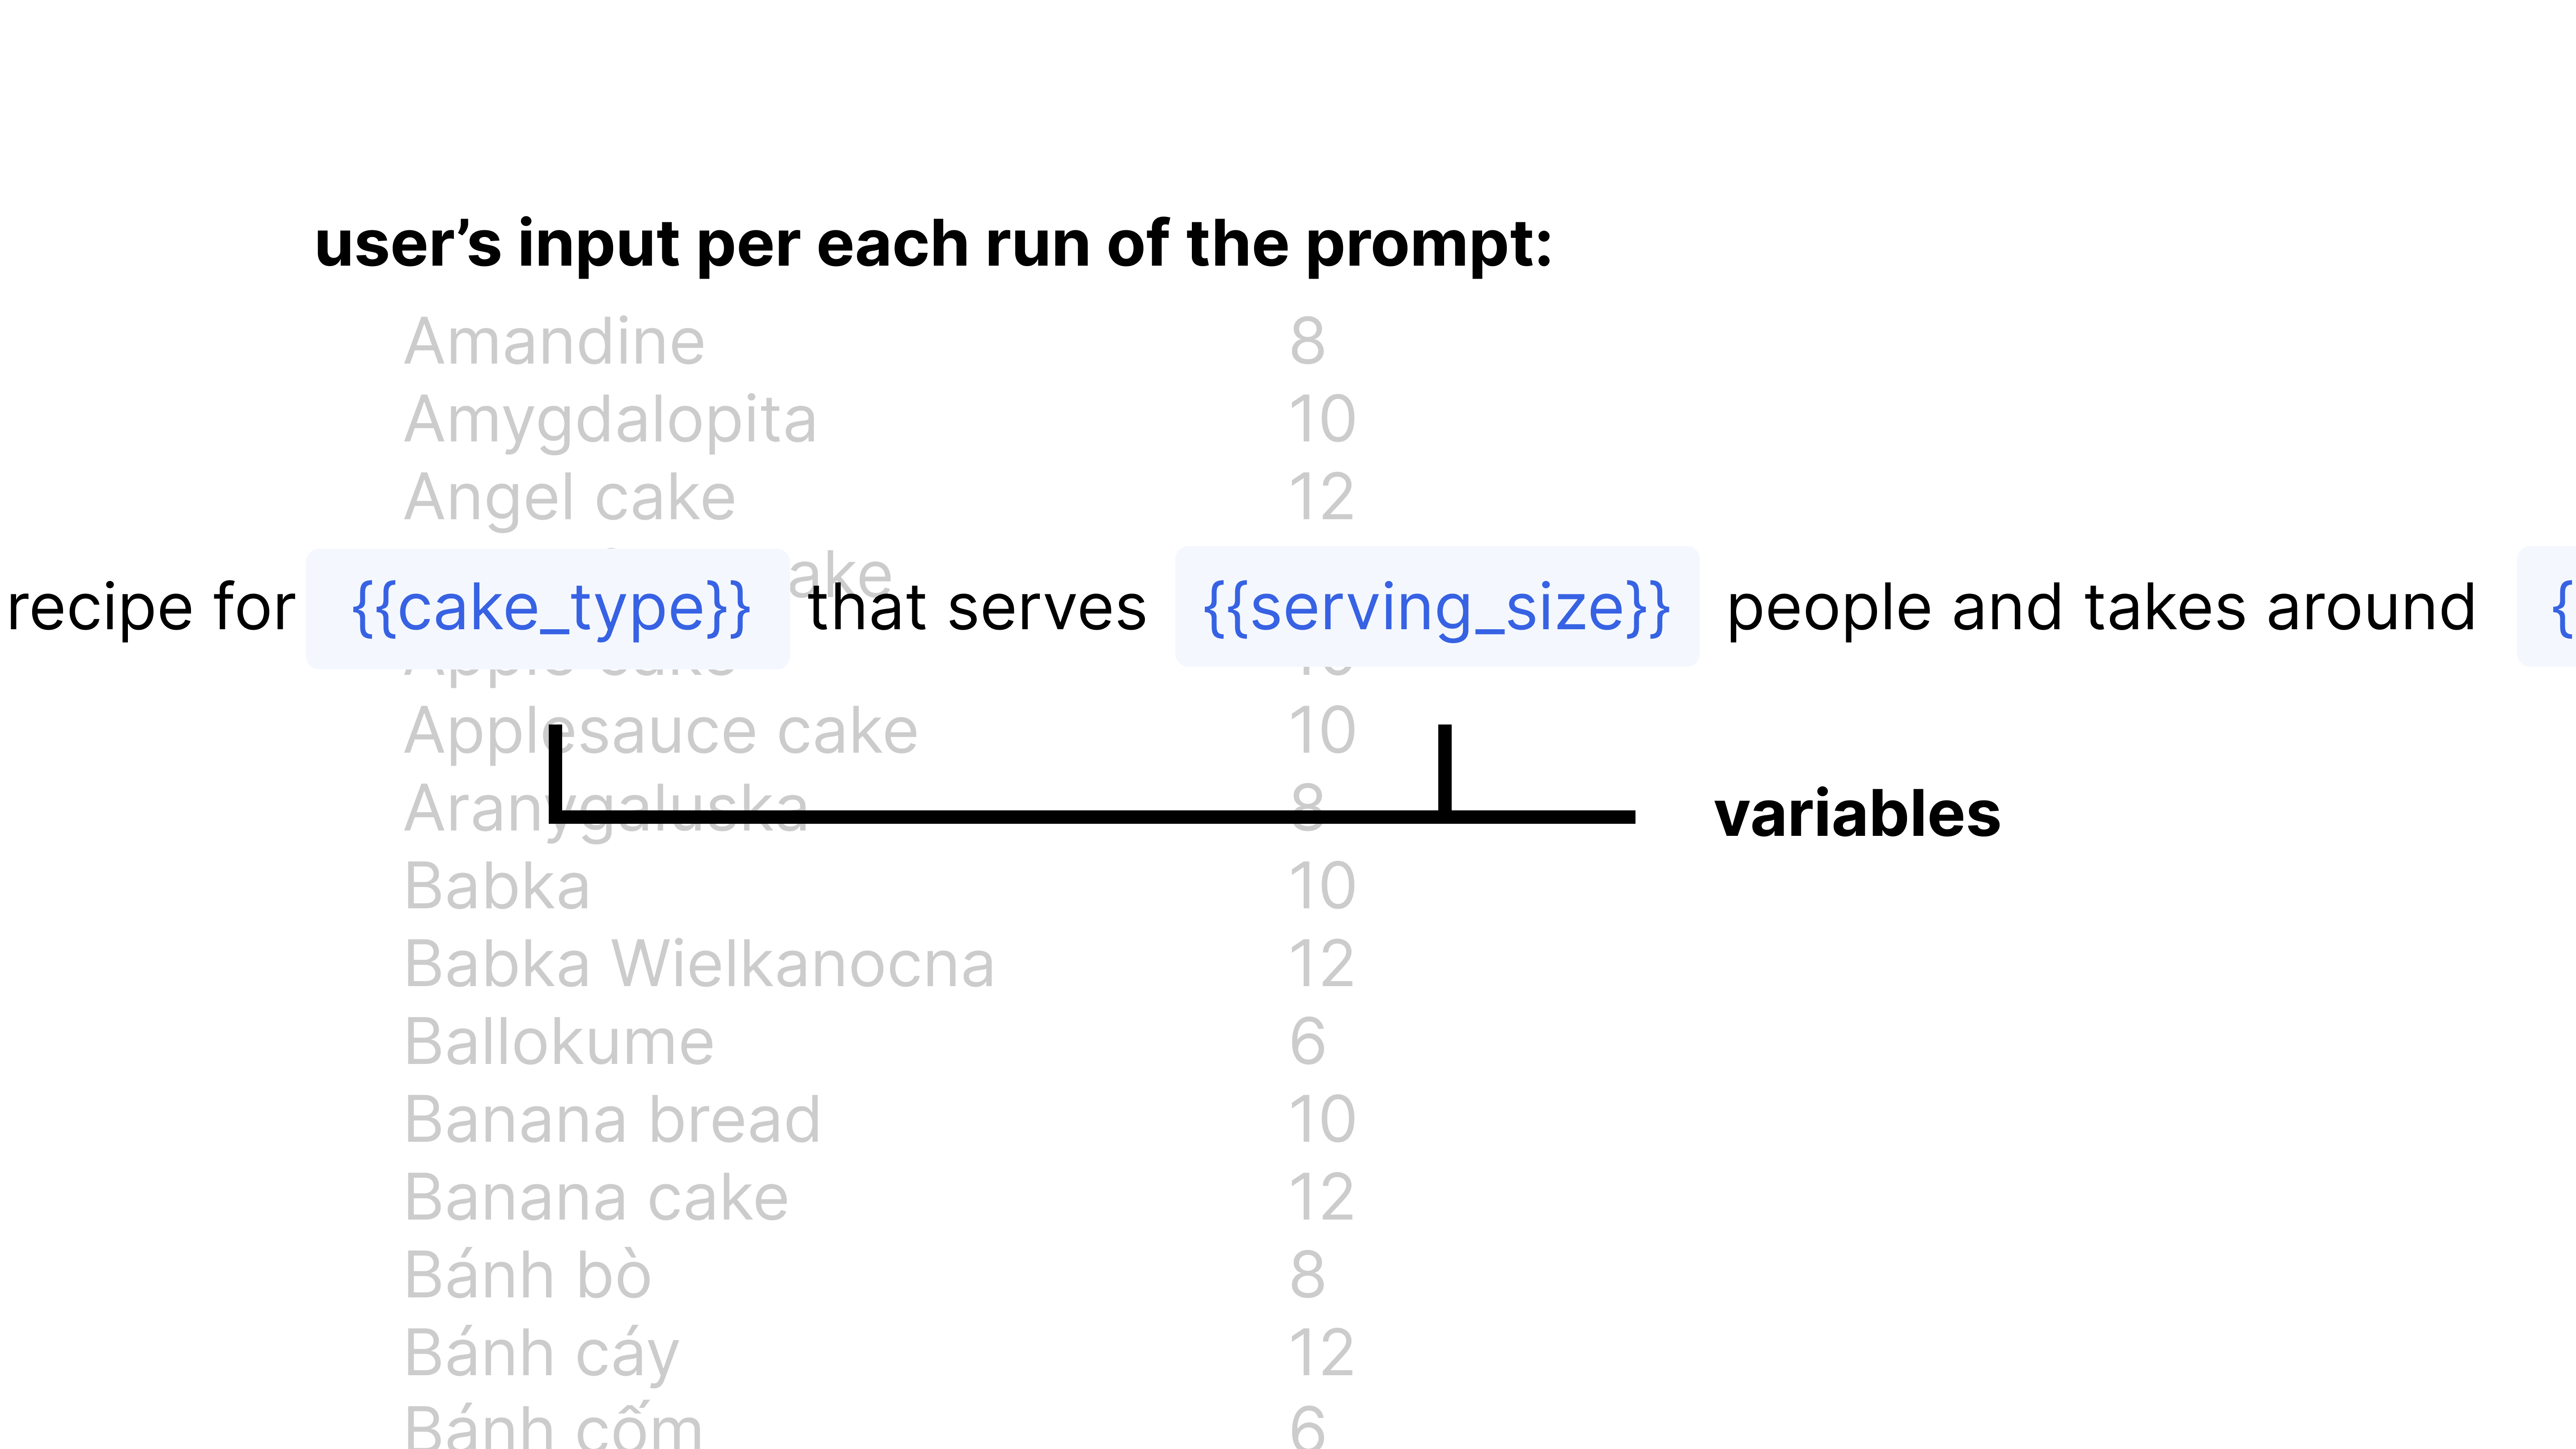
User
{{cake_type}} and {{serving_size}} are input variables. PromptLayer fills them in each time you run the prompt.
Write prompts with AI
Click the magic wand icon to open the AI prompt writer. It can help rewrite or improve your prompts based on your instructions. Try asking it to add allergy warnings to the recipe generator.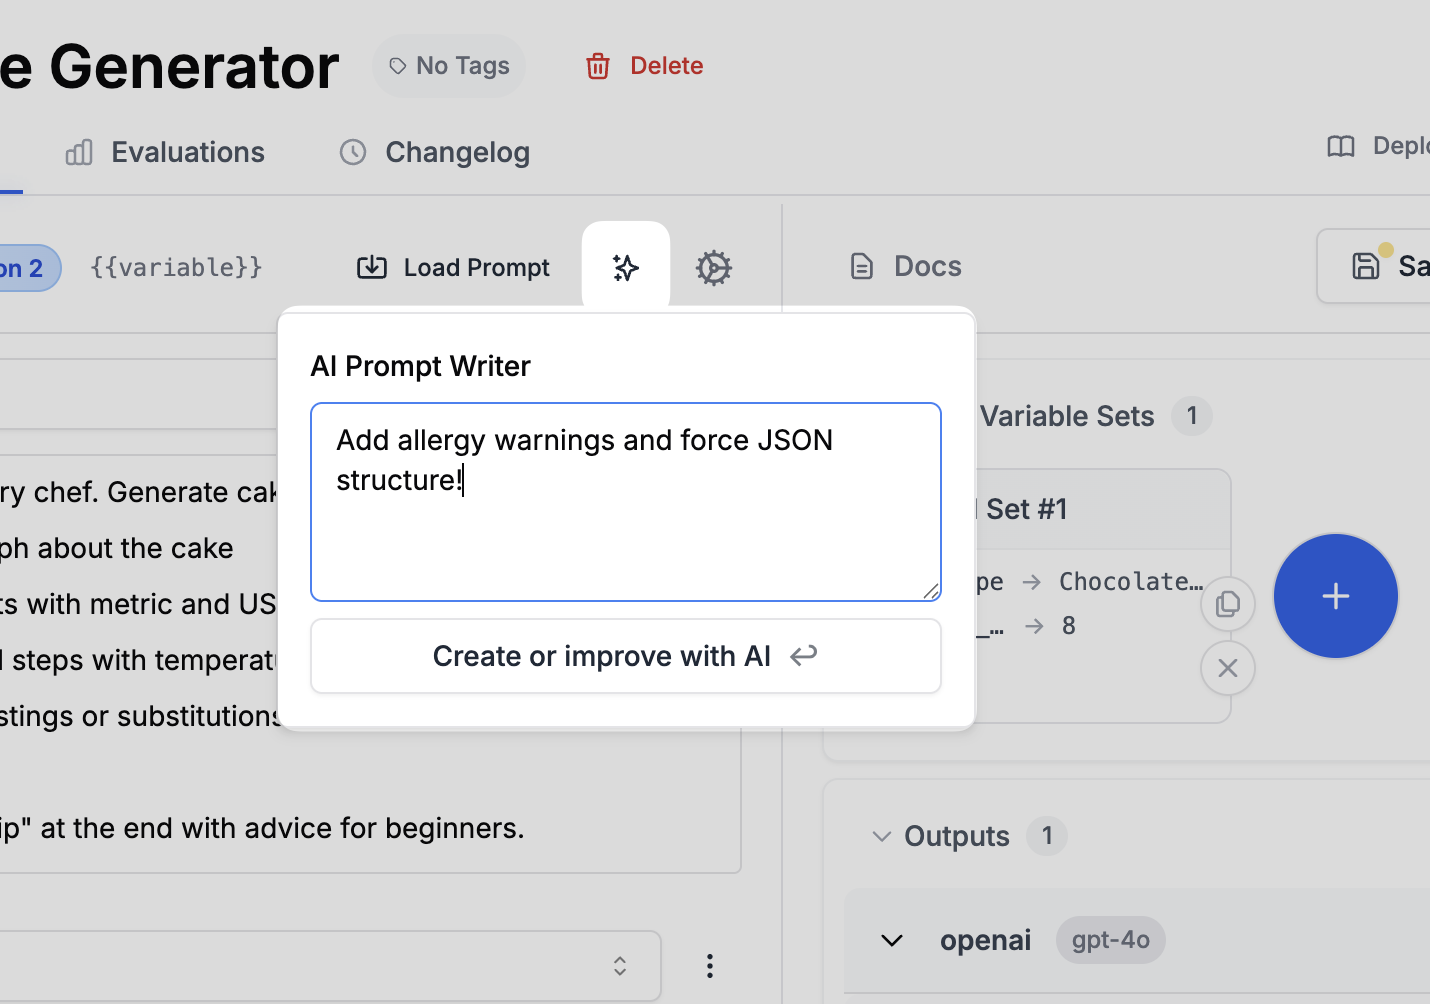
Run your prompt
To test the prompt in the playground:- Click Define input variables in the right panel.
- Set
cake_typetoChocolate Cake. - Set
serving_sizeto8. - Click Run.
View logs
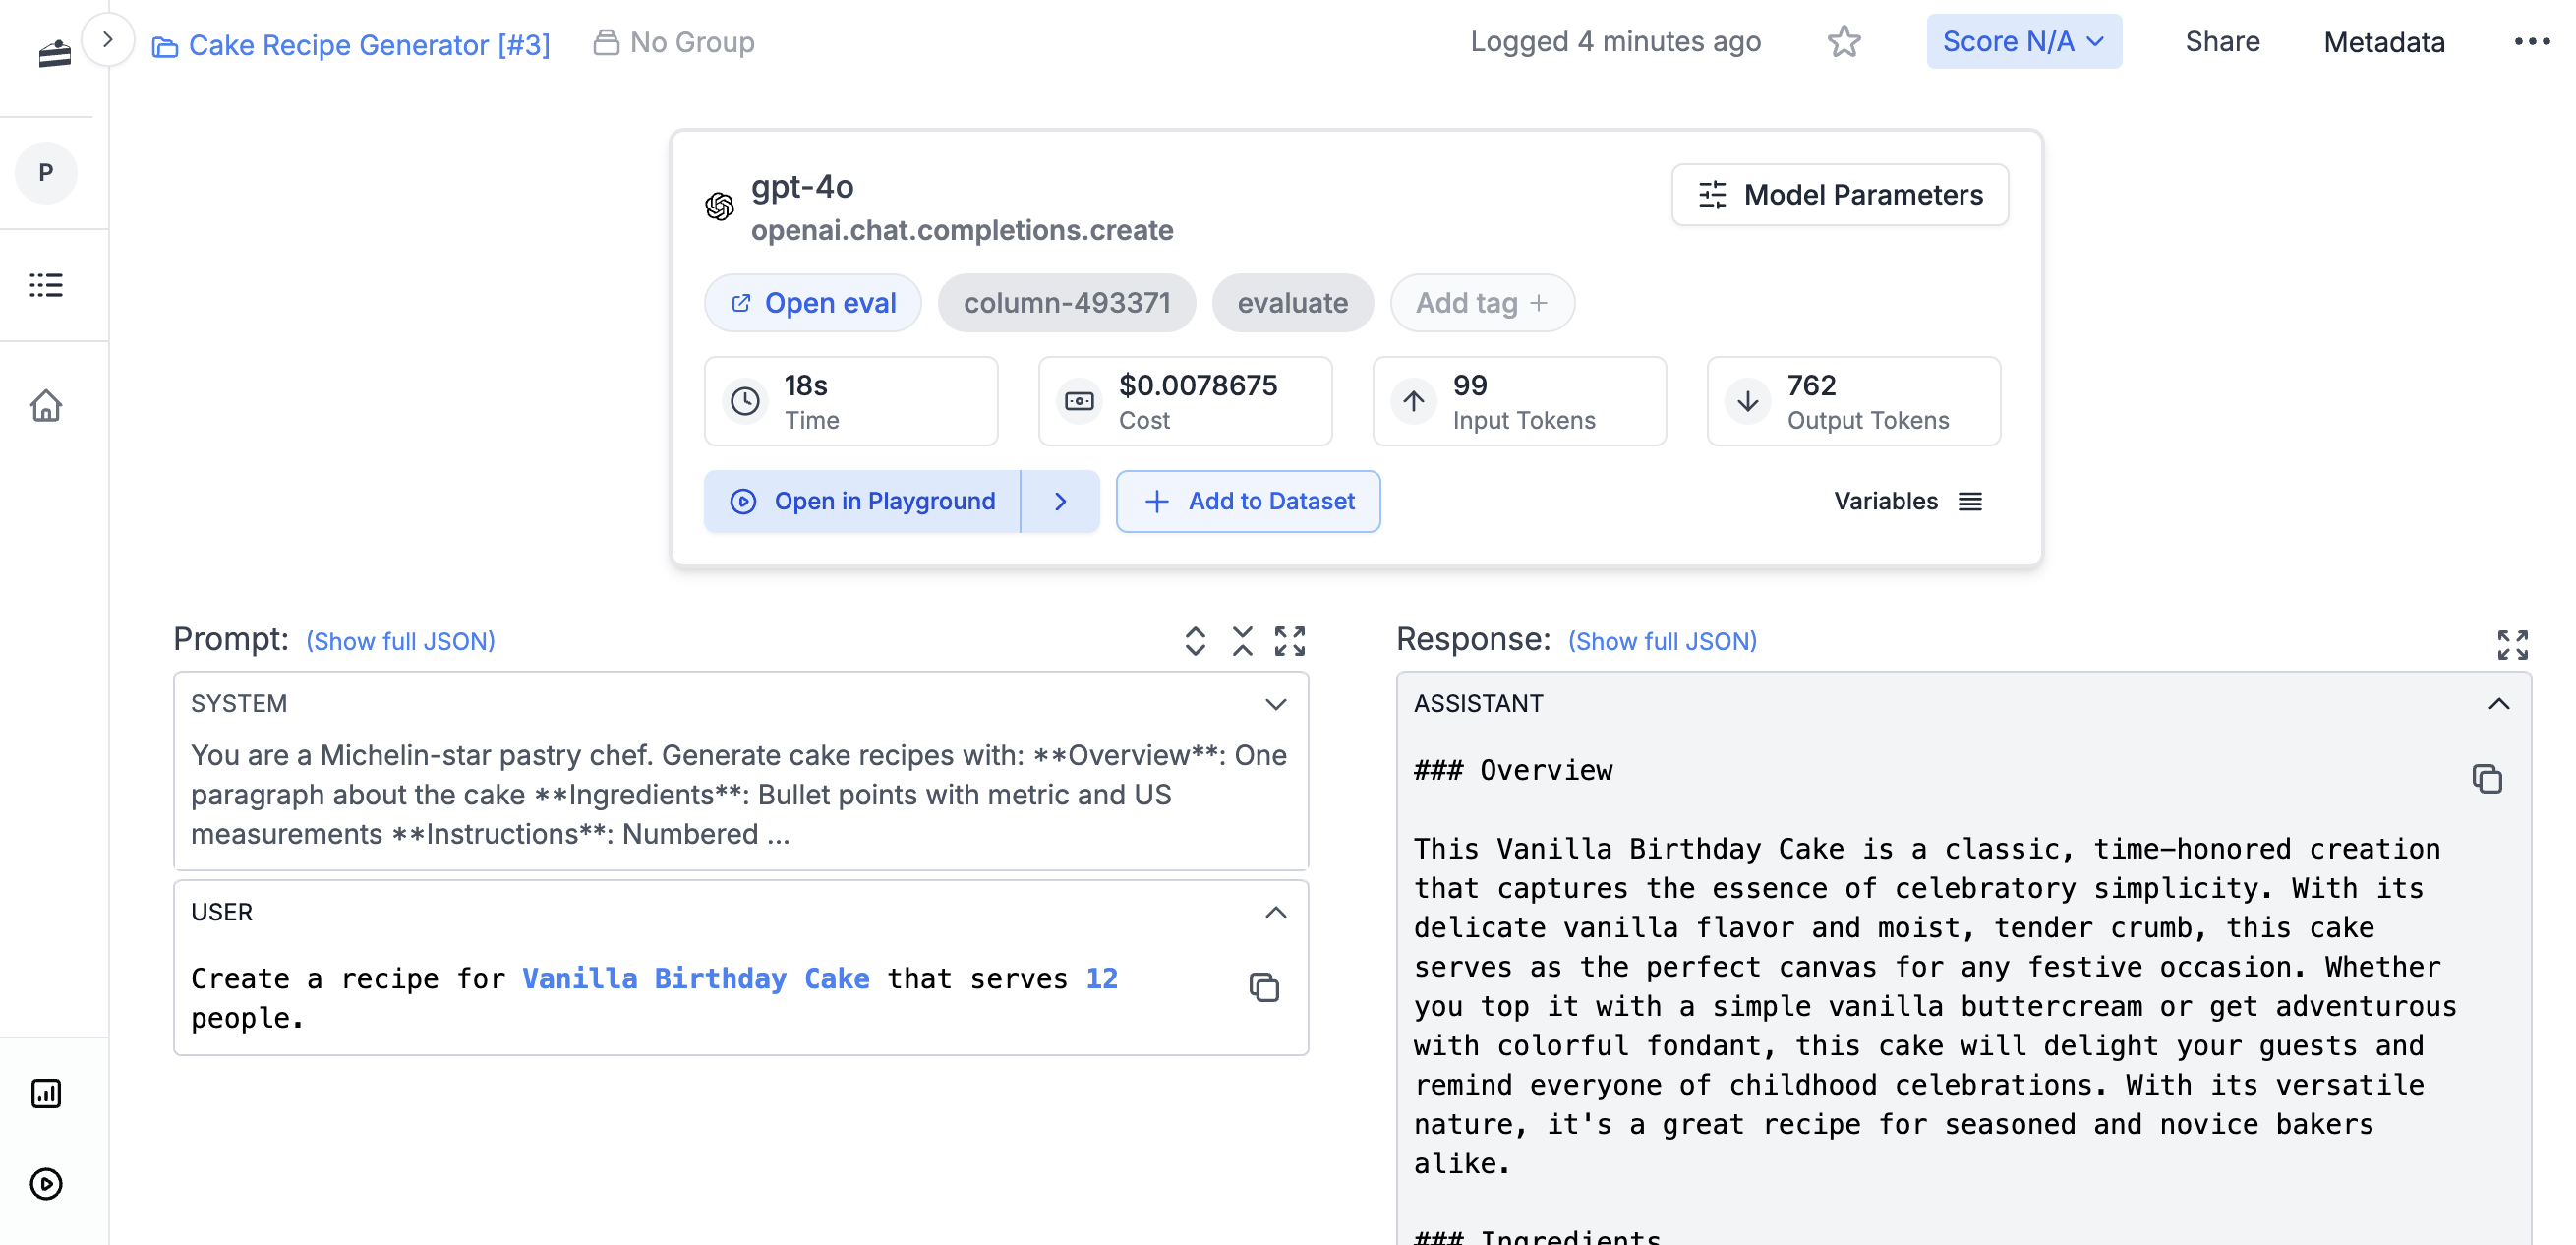
Open Logs in PromptLayer and search forcake-recipe. The log should show the input variables, generated output, model, and latency.
Run from code
To run the prompt from code, make sure you have:- A PromptLayer API key from your workspace
- A provider API key for the model you plan to use, such as
OPENAI_API_KEY
Evaluate a prompt
Before deploying a prompt, you want to know if it is actually good. PromptLayer lets you build evaluation pipelines that score your prompt’s outputs automatically.Create a dataset
Evaluations run against a dataset: a collection of test cases with inputs and expected outputs. Create one for the cake recipe prompt. Click New -> Dataset and name itcake-recipes-test.

cake_type and serving_size, plus an optional expected output to compare against.
Sample CSV for cake recipe dataset
Sample CSV for cake recipe dataset
Create an eval pipeline
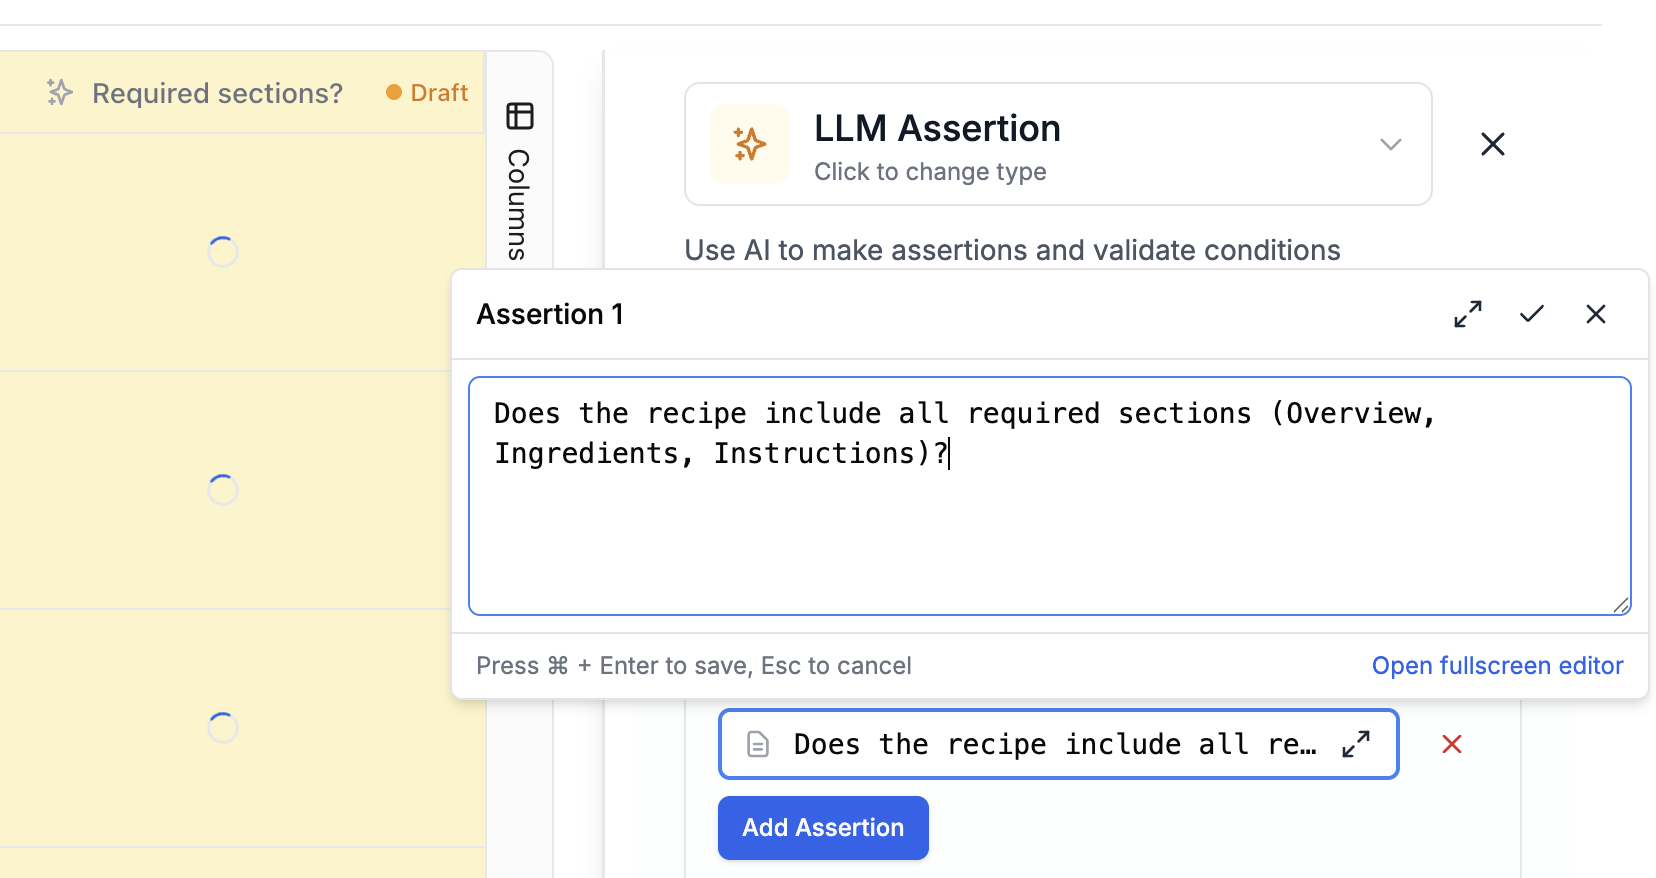
Now build a pipeline that runs your prompt against each test case and scores the results. Click New -> Evaluation and select your dataset. First, add a Prompt Template column. This runs your prompt against each row in the dataset, using the column values as input variables. The output appears in a new column. Next, add an LLM-as-judge scoring column. This uses AI to score each output against criteria you define. For the recipe prompt, check whether:- The recipe includes the required sections: Overview, Ingredients, Instructions, and Variations
- Measurements are provided in both metric and US units
- The serving size is correct
expected_output column in your dataset.

Other evaluation types
Other evaluation types
Beyond LLM-as-judge, PromptLayer supports:
- Human grading: Collect scores from domain experts
- Equality Comparison: Compare outputs to expected results
- Cosine similarity: Measure semantic similarity between outputs
- Code evaluators: Write custom Python scoring functions
CI/CD evaluations
Attach an evaluation pipeline to run automatically every time you save a new prompt version, similar to GitHub Actions running tests on each commit. When saving a prompt, the commit dialog lets you select an evaluation pipeline. Choose one and click Next. From then on, each new version you create will run through the eval and show its score in the version history. This makes it easier to spot regressions before they reach production.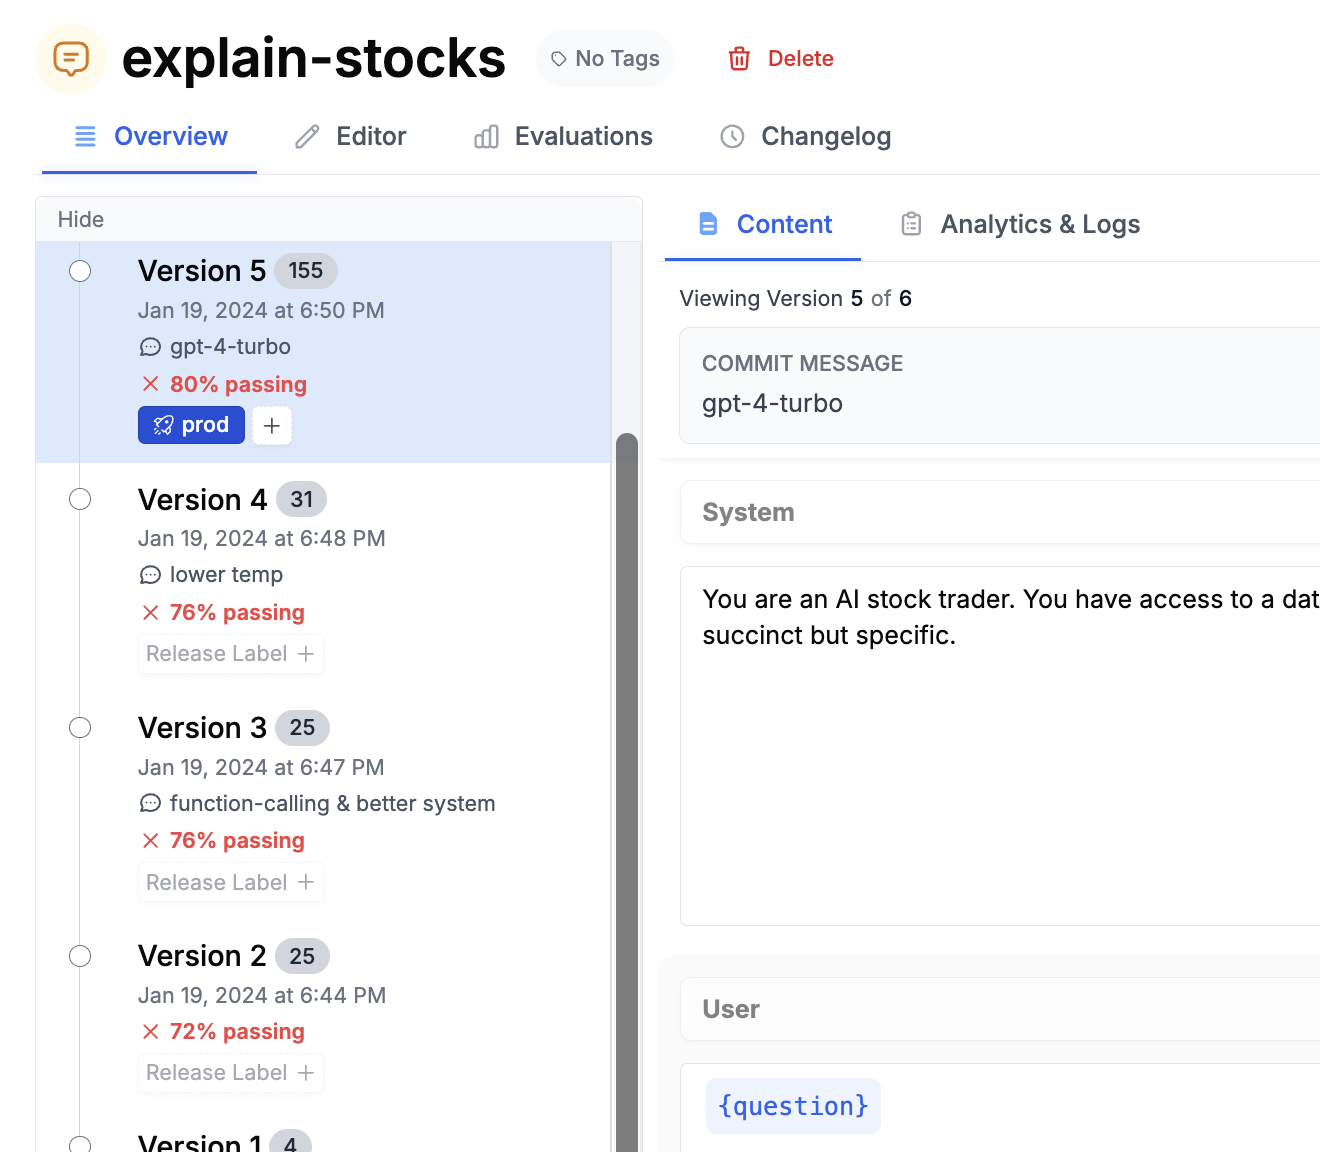
Learn more
- Release Labels - Deploy the right prompt version without code changes
- Evaluations - Learn how evaluation pipelines work
- Deployment strategies - Choose a production integration pattern